
How to Speed Up Website with Imagekit Free CDN

No one likes a website that runs slow. Research has shown that page load speed impacts strongly to search engines rank, engagement, brand advocacy, and conversion levels:
- 47% expect a page to load in 2 seconds or less.
- 40% of users will abandon a webpage if it takes more than 3 seconds to load.
- 1 second delay (or 3 seconds of waiting) decreases customer satisfaction by 16%.
Wow, it seems serious. My website runs an average speed of about 4 seconds, according to tools.pingdom.com and webpagetest.org. I did some improvements, such as minified CSS, JS, and HTML and using cache plugin. But, those affect a little.
Here are the speed test results of my website:
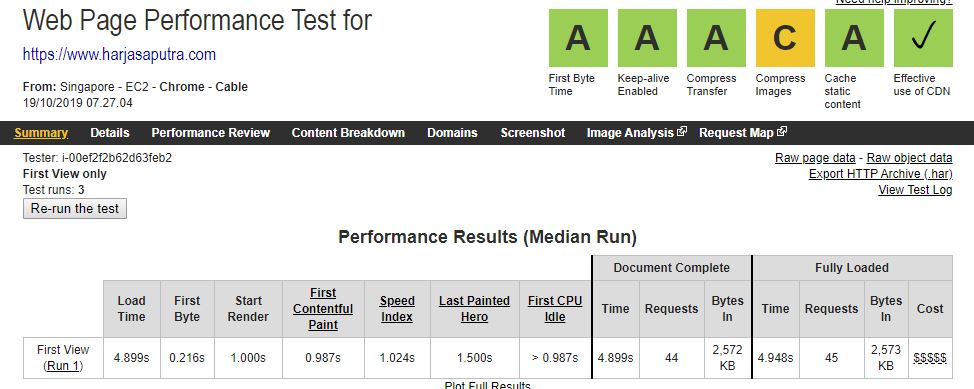
My biggest problem is the images. About 70 percents of my website are images. From the result above, the rank for images indicator is C. It indicates need further optimization.
I decided to find a CDN provider for pulling my images assets. Of course, a free CDN. Although I've used Cloudflare that includes free CDN for caching images but does not affect too much for increasing speed. And I found the good one: Imagekit.io.
Pulling Images from Imagekit Free CDN
Imagekit CDN (Content Delivery Network) is for images only. With Imagekit plugins for Wordpress, it will automatically be pulling images from imagekit storage, and the visitor will loads images not from the origin server, but imagekit network.
Imagekit.io has good infrastructures. Higher availability and great performance across the globe. CloudFront CDN for faster asset delivery with 150 nodes. Imagekit also has a node in Singapore. I think this is a very good point for serving images from imagekit.
Imagekit CDN has three pricing plans: Forever Free, Premium, and Enterprise. The free plan includes 20 GB bandwidth per month, the premium plan includes 40 GB and cname feature with USD39 per month and the Enterprise more than 1 TB bandwidth per month.
Free 20 GB bandwidth monthly is enough for me. If daily loading spends 200 MB, then in a month spends only 6 GB.
In the next step, I will show extra tips to make the imagekit bandwidth more efficient by using Cloudflare Cache Page Rules.
Now, we should:
1. Sign Up to imagekit.io. While creating an account, choose an appropriate ImageKit ID, as it will be a unique identifier in your image urls.
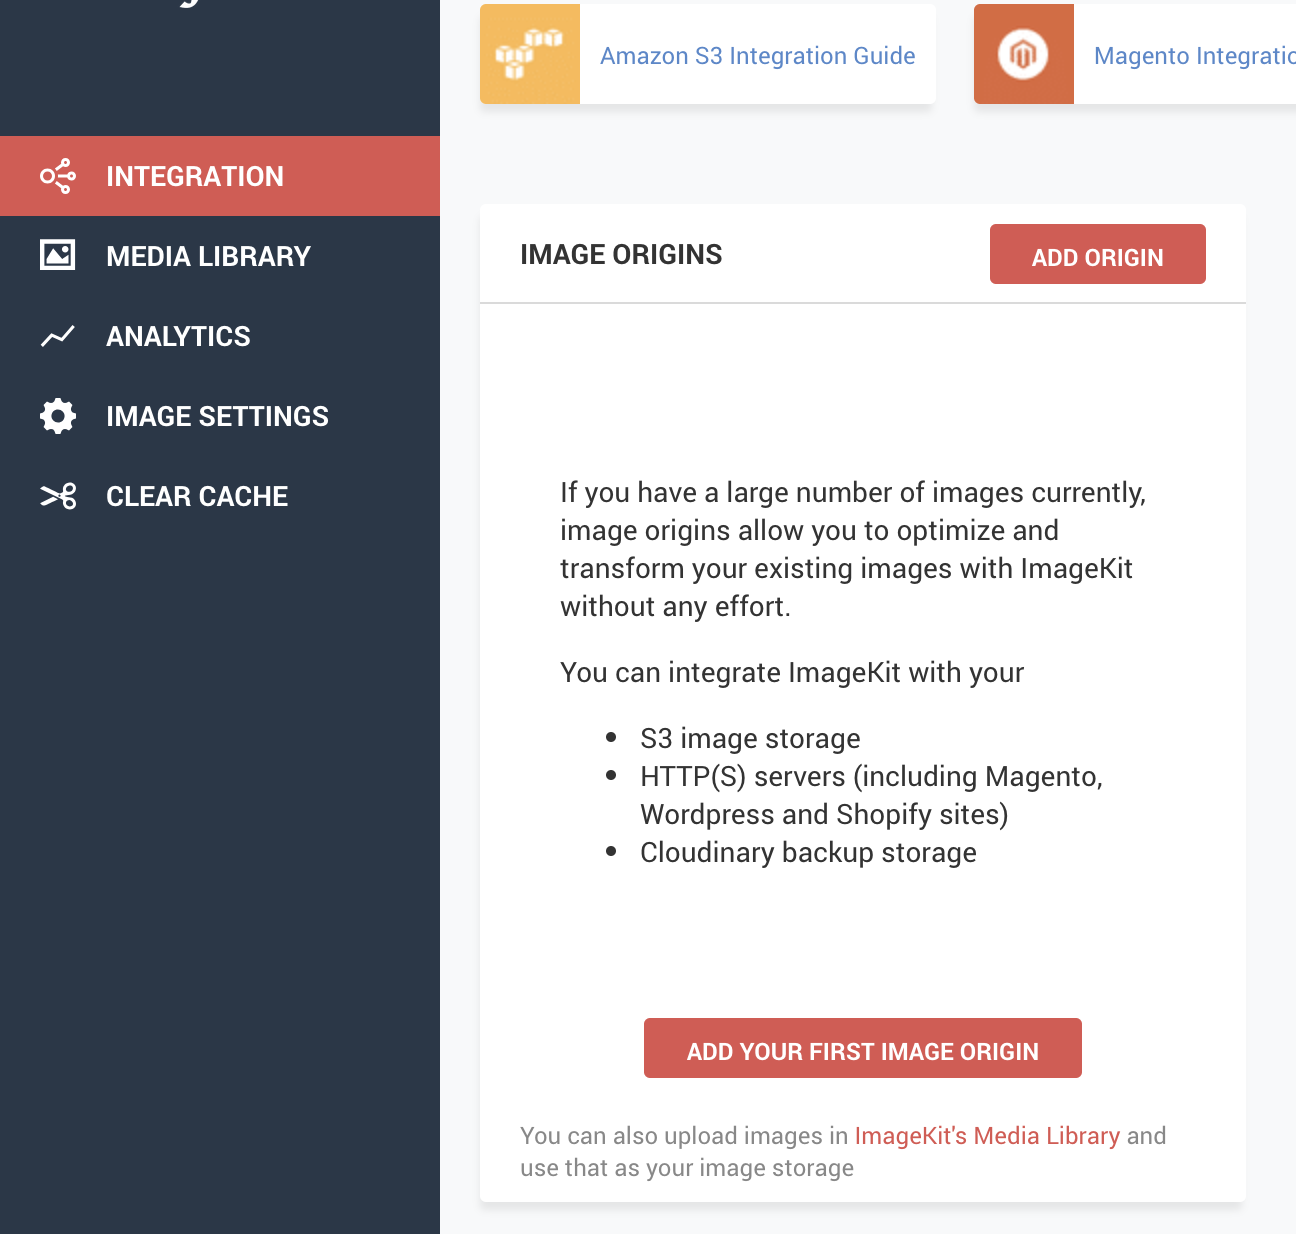
2. Log in to your ImageKit dashboard and go to the integration section.
3. Add a new image origin by clicking on the "Add Origin" button.
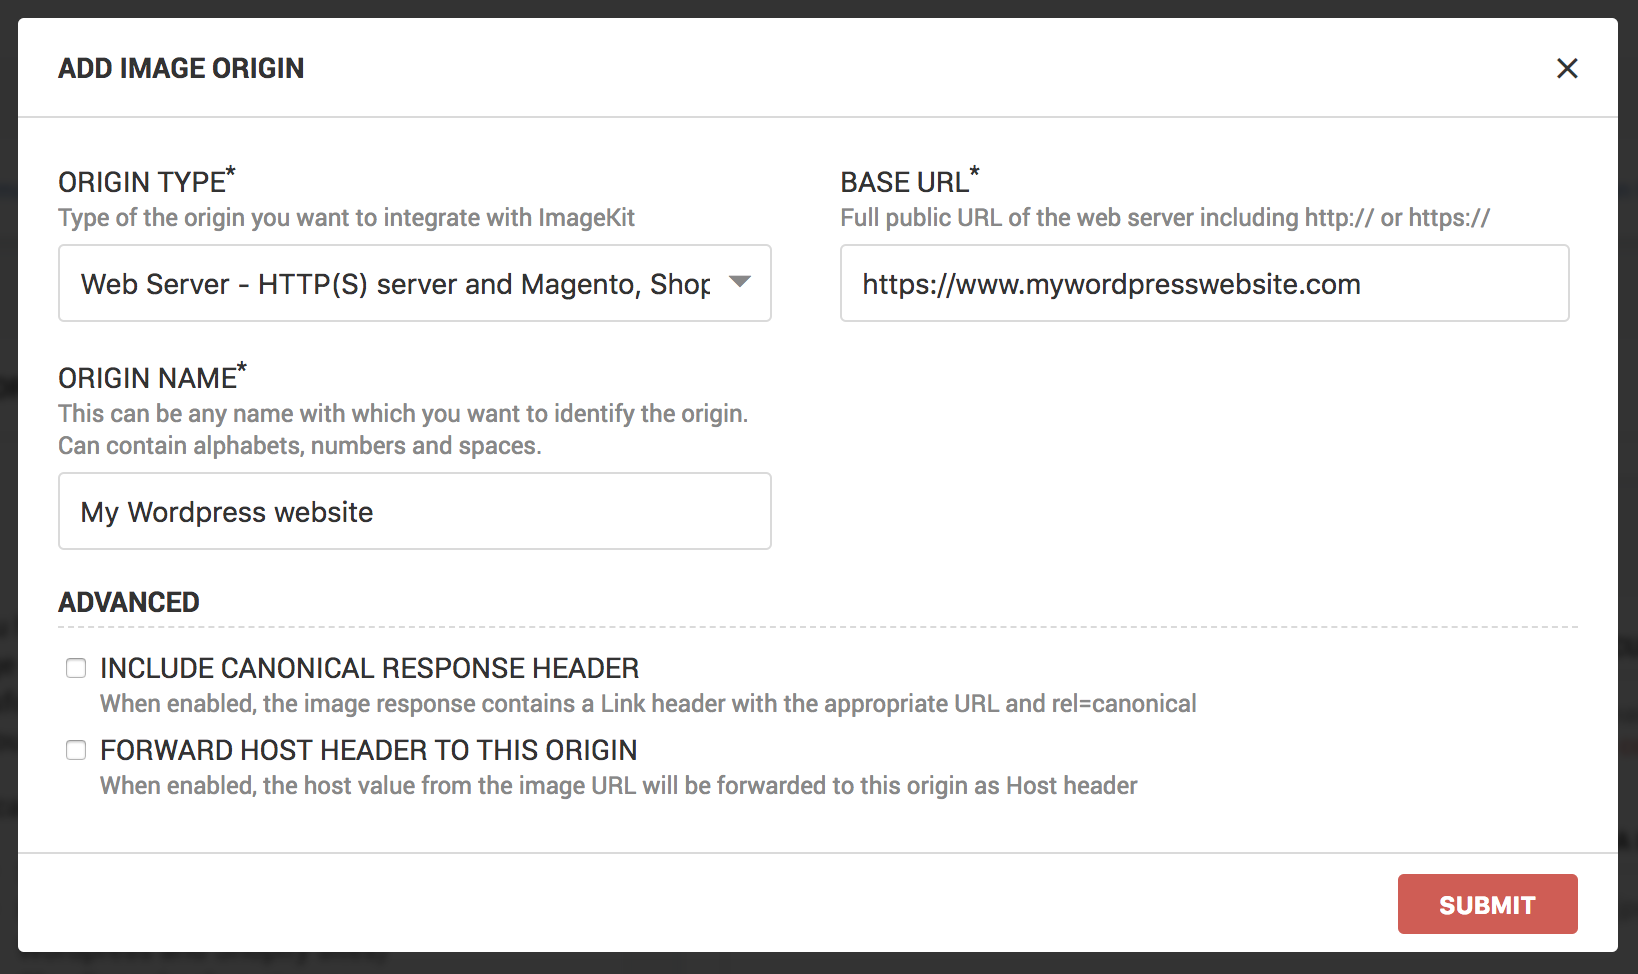
4. To integrate ImageKit with the images on your server, you need to add your server as an origin for ImageKit. For this purpose, we need to set the Origin Type as "Web Server, HTTP(S) server and Magento, Shopify, Wordpress etc.". Then fill origin name. In the Base URL fill with your website address:
5. Choose the node location that nearest to your location. I choose the Singapore node.
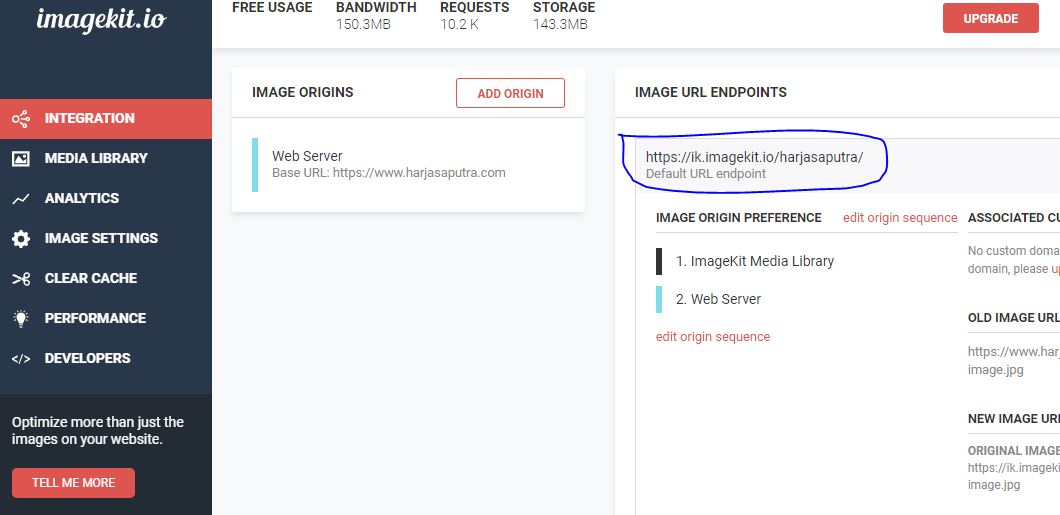
6. Copy Endpoint URL as shown below:
7. Download and Install Imagekit plugin.
8. Paste Imagekit URL Endpoint:
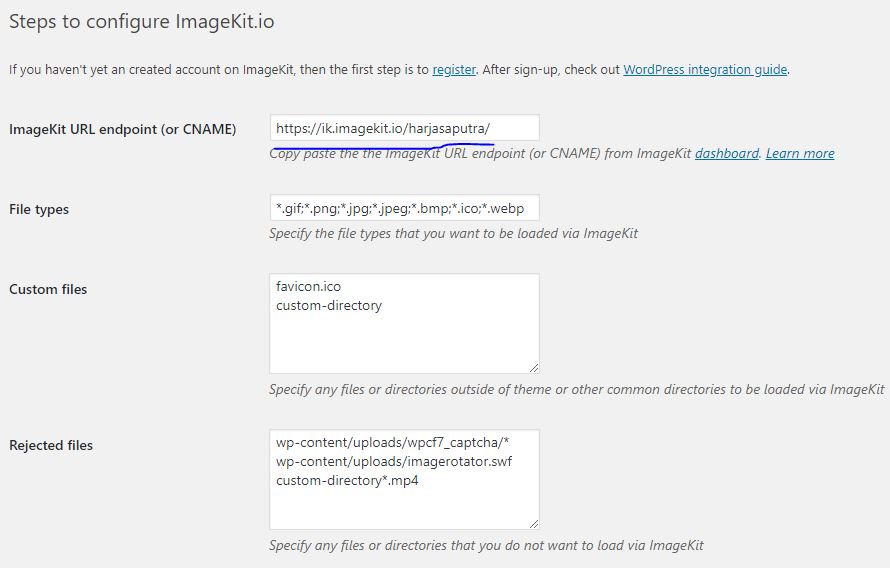
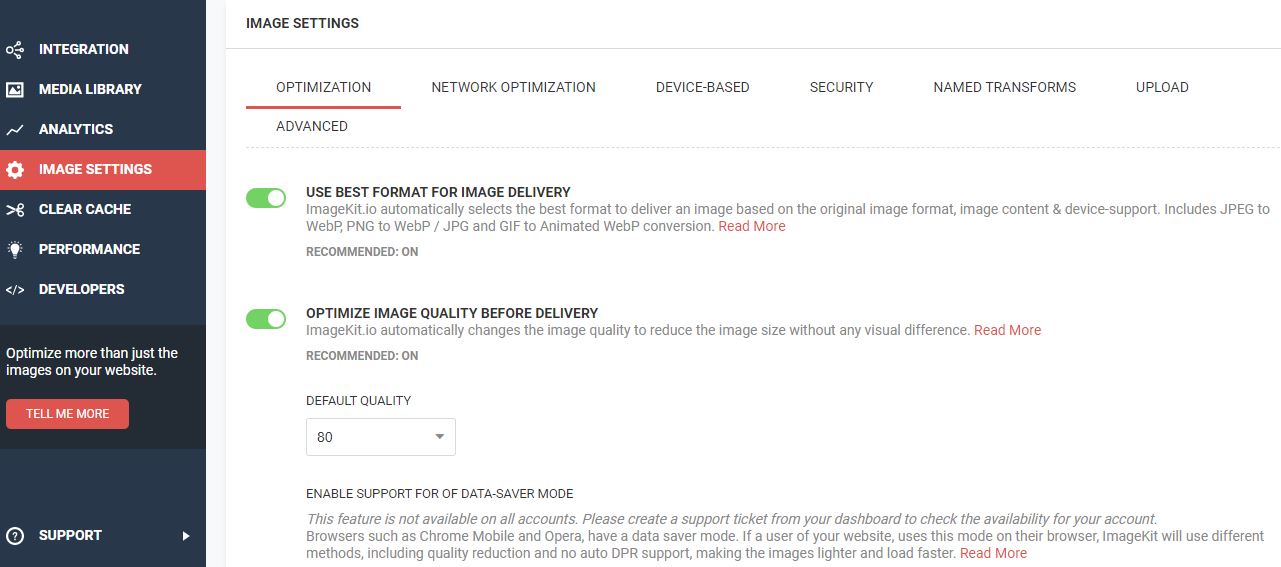
- Imagekit has advanced features like automatic WebP conversion based on browser support, responsive images, client hints, SVG and GIF optimization, make it a complete image optimization product. Those features will be automatically activated when we register, or we can check from this menu:
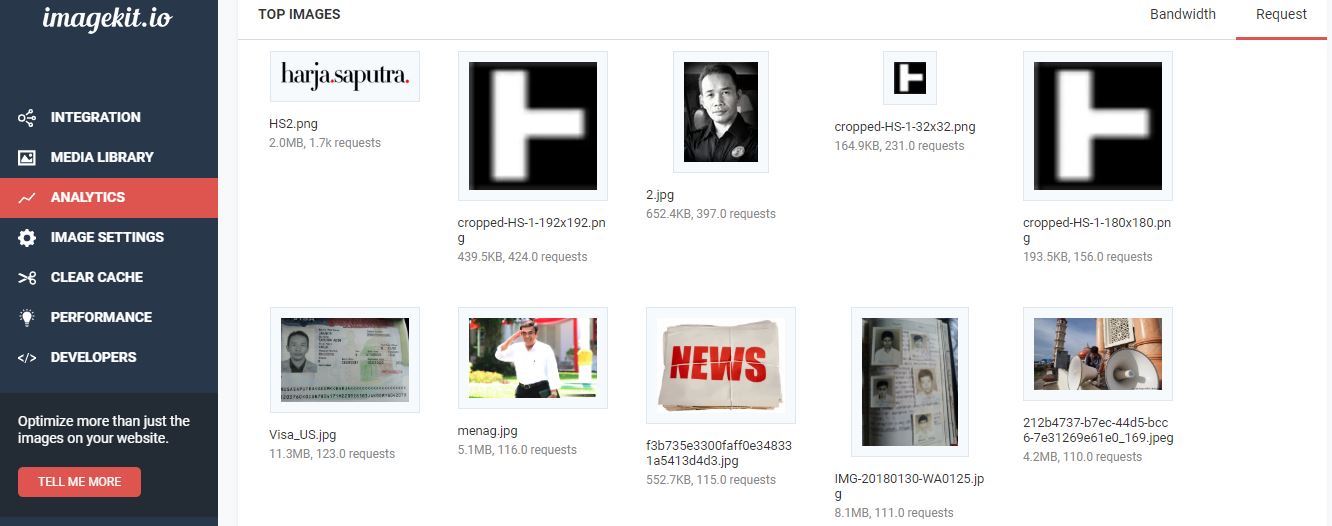
- To check which images served by imagekit, you can see from the "Analytic" menu. It shows how much bandwidth has been spent to pull an image and which top images by request from the origin server:
You can check imagekit CDN is live to serve your images website from Source Page (CTRL+U) in wherever of your pages:
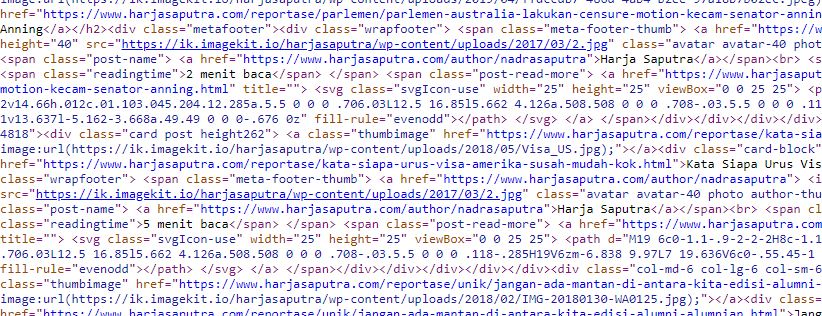
That's all. Very simple and now your images have been served from imagekit CDN. It can be seen from the URL of every image that changes with your Imagekit URL Endpoint.
Now let's measure the speed:
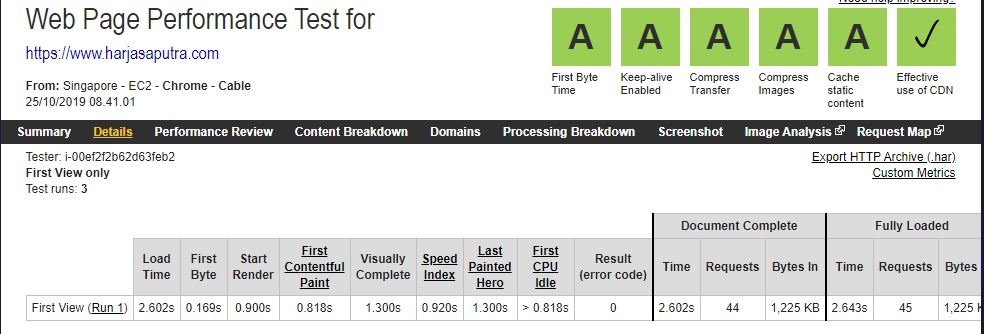
Voila, the images indicator is A and the speed now 2.6 seconds. Imagekit improves speed of almost 50 percent from speed before 4.8 seconds.
Enjoy the blazing speed from Imagekit CDN.*
Comments